SolidWorks workflow
SolidWorks to Revit: create a lighting family with IES
For a SolidWorks to Revit family workflow, prepare the luminaire as simple solid bodies, choose File → Save As → ACIS (*.sat), open Options, and set ACIS version 7.0 or 4.0, Solid output and the correct units. BIMMER does not upload .sldprt or .sldasm directly; pair the exported SAT with IES to create a Revit 2025+ RFA.
Before you upload
SolidWorks: export the correct SAT
BIMMER needs text SAT + IES. Export the geometry first; native CAD, STEP and binary SAB are not direct uploads.
- Text .sat
- ACIS 7.0 or 4.0
- Solid geometry
- Known units · mm preferred
- If direct assembly export loses bodies or useful names, try File → Save As → SOLIDWORKS Part → All components on a copy. Keep all required components as separate solid bodies.
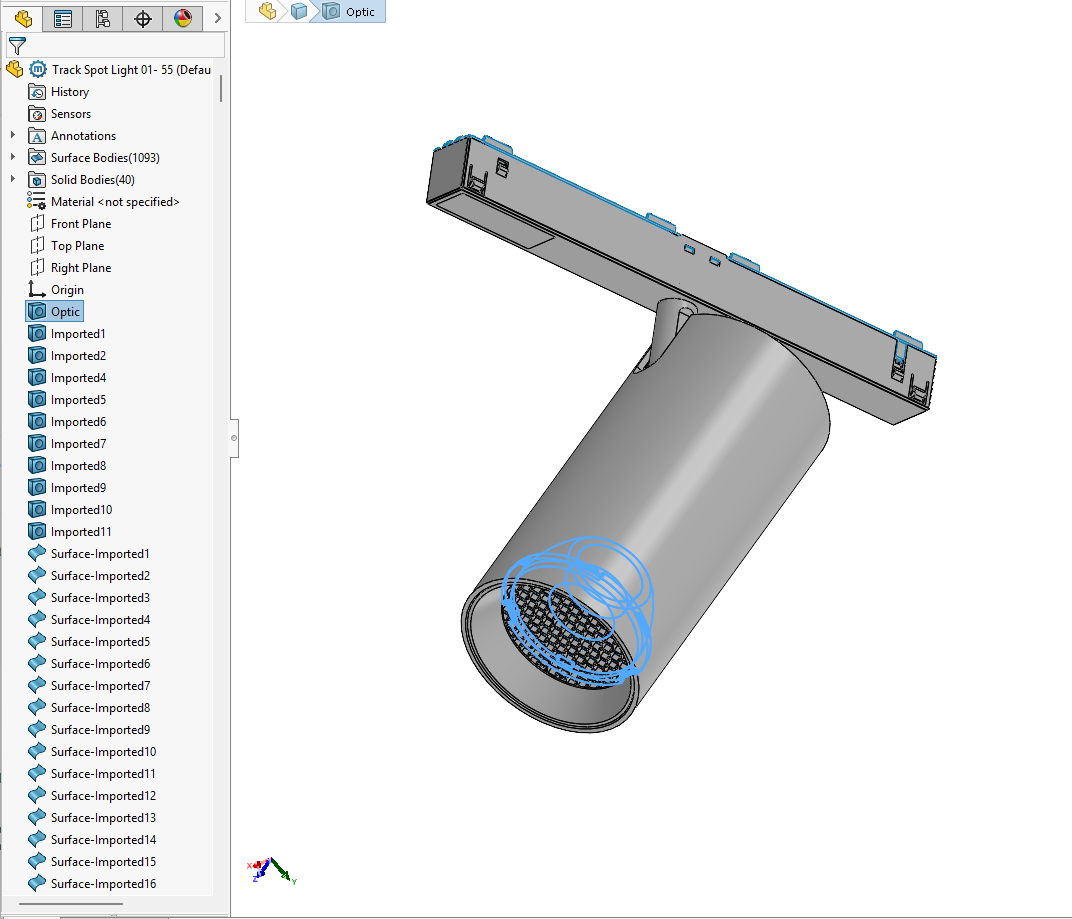
- If the file is too heavy, remove unnecessary manufacturing detail. Keep the outer shape, all optical parts and mounting geometry. Before export, give light-source parts accurate names: Lens, Optic, COB, LED, Lamp or Glass; label holders as holders and mounting parts as Canopy, Mounting foot or Back plate. Check the selections in BIMMER and every source and connector in Preview.
- Retain the bezel, housing and lens as separate bodies. Check the emitting-body selection before Generate; changing the tree order is optional.
- Set Tools → Options → System Options → Export → ACIS to version 7.0 (or 4.0), Solid/Surface geometry and Millimeters. Leave “Write multi body part into a single ACIS body” unticked and click OK.
- Use File → Save As and select ACIS (*.sat) in the file-type list. Confirm the selection, enter a filename and Save. The same format settings are also available through Save As → Options.
- Re-open the SAT and compare body count and a known dimension with the part. Upload it with matching IES, generate, and inspect the RFA.
Names help detection. Name the actual light-source parts Lens, Optic, COB, LED, Lamp or Glass. Keep holders labelled as holders; name mounting parts Canopy, Mounting foot or Backplate.
A 700 or 400 SAT header identifies ACIS 7.0 or 4.0. Check the actual export; changing the file extension or editing the header does not convert geometry.
In your CAD software
SolidWorks export settings
Tools → Options → Export → ACIS, then File → Save As → ACIS (*.sat)
Set File Format to ACIS, choose Solid/Surface geometry, Version 7.0 (or 4.0) and Millimeters. Leave “Write multi body part into a single ACIS body” unticked. For a large assembly, first use Save As → Part → All components; keep the useful bodies separate.
Set the ACIS options
Open Tools → Options → System Options → Export. Choose ACIS and match the settings shown, then click OK.
Save as ACIS SAT
Choose File → Save As and select the highlighted ACIS (*.sat) item. Confirm the selection, enter a filename and Save.
Before BIMMER: re-open the SAT, check the required bodies and measure a known dimension. Then upload the SAT + matching IES. Menus may vary by software version.
Direct support status
| Input | Directly accepted? | Required action |
|---|---|---|
| SolidWorks .sldprt / .sldasm | No | Open in SolidWorks and export ACIS SAT. |
| SolidWorks ACIS SAT 7.0 or 4.0 | Yes | Use Solid output, correct units and separate bodies. |
| SolidWorks default/current ACIS version | No | Change the version in ACIS export Options before saving. |
| Matching IES | Yes | Add it to the same fixture row as the SAT. |
SolidWorks to Revit needs a BIM-ready configuration
A production model and a specification model have different jobs. Keep your manufacturing detail in the master assembly, but export a configuration that preserves outer shape, mounting interfaces, aperture and meaningful material zones. This reduces family weight and lowers the chance of damaged faces in translation.
Review the source and preserve useful bodies
BIMMER suggests the emitting part from names and geometry. Check that selection before Generate; a tree-order guess requires confirmation. Keep multibody output unmerged to preserve source boundaries and help separate-part output. Revit may still merge touching housing parts.
Common failures and what to change
SolidWorks exported SAT but BIMMER/Revit sees no geometry.
Open ACIS export Options and select 7.0 or 4.0; the default current version is commonly too new.
Every component arrives as one body.
Clear “write multi body part into a single ACIS body” and export from a multi-body part/configuration.
A detailed assembly creates a slow or broken family.
Use a simplified derived part or configuration and suppress small/internal components before export.
Every body has the same name, or the part split lost bodies.
Review parts by their numbers if names repeat. If the export lost bodies or the split fails, try a copy saved as a multibody part, retain all required parts and export that copy as SAT 7.0.
Questions manufacturers ask
Can I drag a SLDPRT directly into BIMMER?
No. Export the part or a simplified assembly configuration to ACIS SAT 7.0 or 4.0 first.
Should I merge all SolidWorks bodies?
No when you want separate Revit geometry/materials. Leave the multi-body merge option unticked; a merged solid can convert but behaves as one part.
Is BIMMER a direct SolidWorks to Revit converter?
No for native SLDPRT or SLDASM files. SolidWorks must first export the simplified geometry as text ACIS SAT 7.0 or 4.0; BIMMER combines that SAT with IES into the RFA.
Primary references
- ACIS files and export options — SOLIDWORKS
- Save an assembly as a multibody part: All components — SOLIDWORKS
- About importing ACIS objects into Revit — Autodesk
- Specify an IES file for a light source in Revit — Autodesk